Wednesday 31 January 2018

Red and black Combo!!!

Heya folks,

Hope everyone is doing great.

So I recently posted about the revamping of glitter jhumkas with the addition of heat embossing to them procedure. The response was totally encouraging.

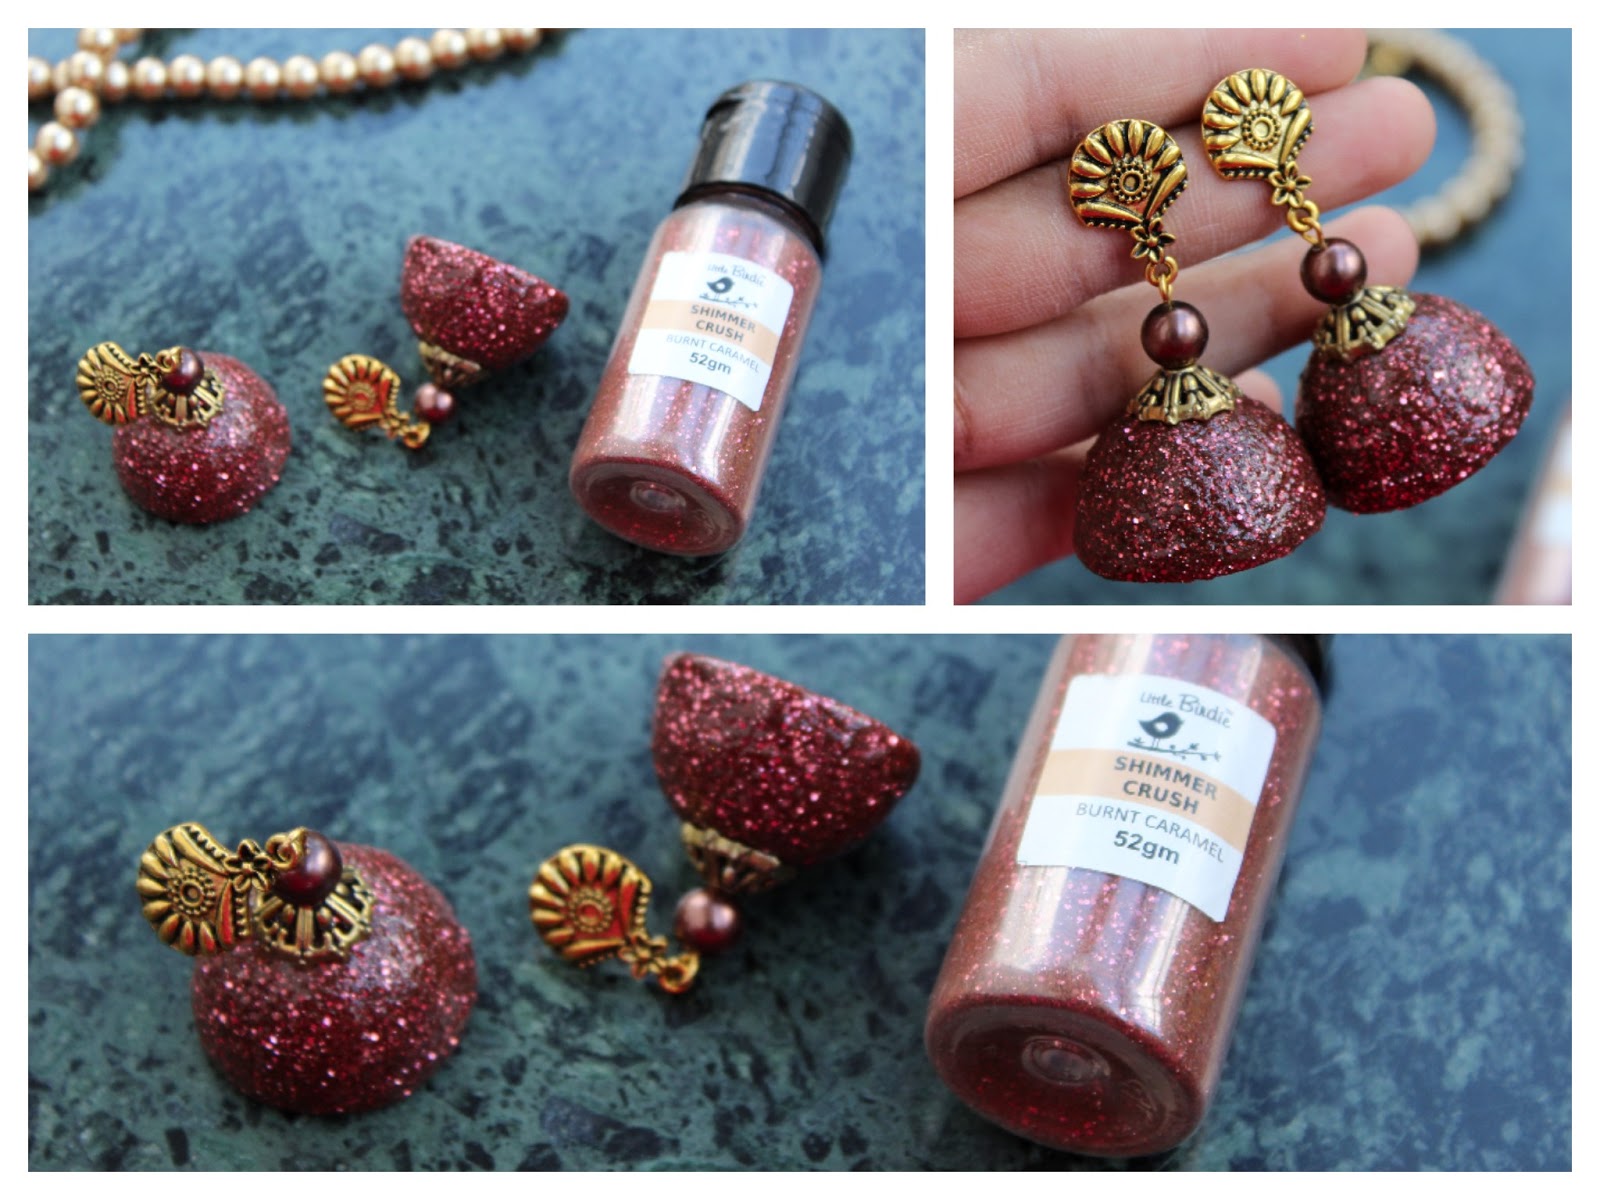
This is a revamped version of the previously posted set feat. MUDRA stamp Henna elements designed by Pritesh!!!

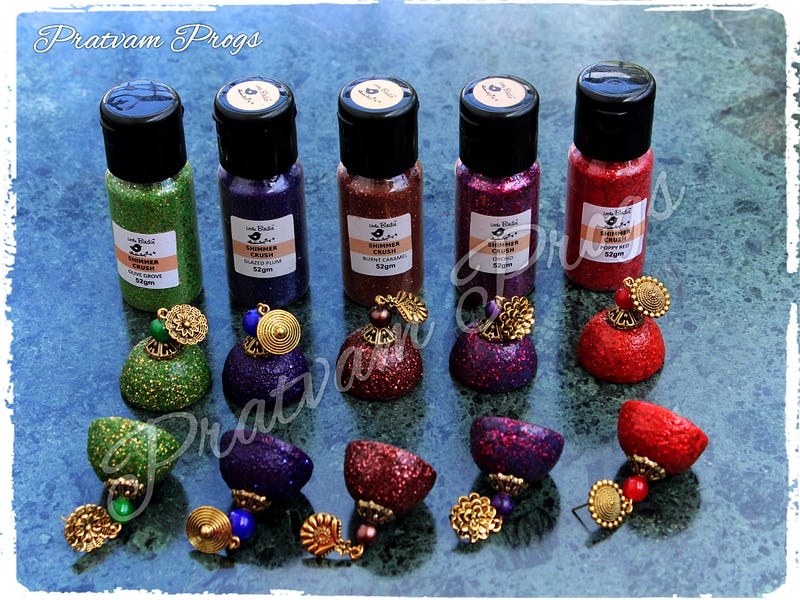
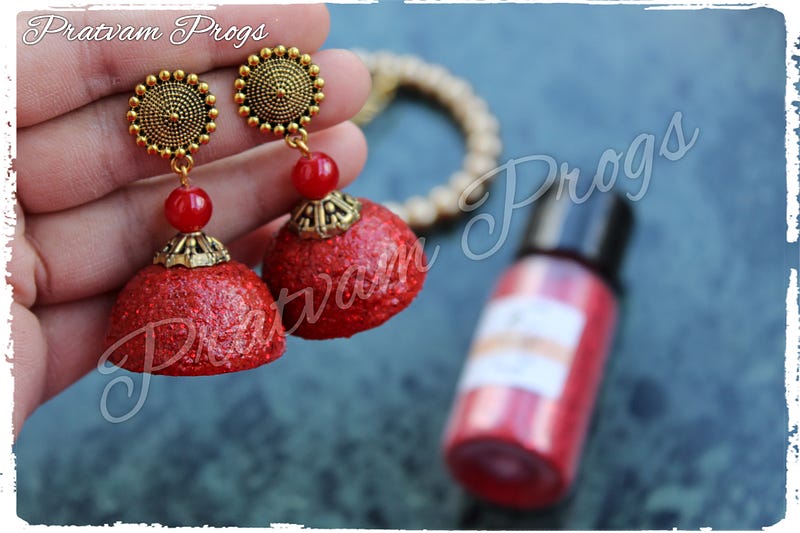
This time around used red fairy dust glitter from Itsy Bitsy as the base, Heat embossed the stamps using Ranger Ink superfine black embossing powder. 

To accentuate the beauty of the set I added in dyed gold beads from A1 Craft, golden bails and studs from AJ Beads and Findings, Black rhinestone and ball chain from Teena Kg!!!


Thanks for stopping by,

Have a crafty day ahead

Lots of love,
Pratyusha.


Monday 29 January 2018

Simple is best!!!

Heya folks.

Hope everyone is having a crafty week.

When I first started making quilled jewelry I didnt venture much into making jhumkas.
But once I started making them I wanted to make something different than what was being done by others. Thus came in the Decoupage jhumkas. After lot of trial and error I was able to accomplish a fool proof procedure to get the dome right everytime I wanted.

Incorporation of various mixed media techniques into making the dome worked out very well and today I can proudly say that I am able to make the jhumka dome the way I want to with my developed technique.

Today I am sharing a snapshot of one of my recent creations. A simple version of hoop jhumka which has a plain dome adorned with a combination of rhinestone chains and ball chains. This is the simplest version of jhumka I have made after a long time.


So what's your take on these version of quilled jhumkas!!!


Leave your comments :)

Thanks for stopping by. 

Lots of love,
Pratyusha

Thursday 25 January 2018

Glitter and heat embossing technique combo!!!

Heya folks,

Taking the glitter jhumkas up a notch by using MUDRA craft stamps. 

This time I have used Henna elements stamps set which was desinged by PriteshI had a ball trying this set out. 

This is a quilled set. The base is coated with 2-3 layers of golden glitter (Fairy Dust) from Itsy Bitsy. Then I heat embossed one of the elements from the Henna elements stamp set onto the glitter base using superfine detail black Ranger Ink embossing powder. Finished the set off with high quality black beads from The Design CartA1 Craft- bead caps; AJ Beads and Findings for the Bail!!!


Thanks for stopping by,

Lots of love
Pratyusha

Friday 12 January 2018

Crackle effect jhumkas and beaded pendant:

Heya folks,

This order was quite specific. The outline was specific for the colours and the variant of jhumkas she would like.

The jhumkas are a signature variant crackle effect jhumkas.The base colour of the jhumkas is viva decor Inka gold in the colour Steel blue. The golden cracks add more detailing to the jhumkas.
Gold rhinestone chain, magenta and green ball chains dry brushed with Viva decor Inka gold- Gold paste finish the jhumkas. The peacock stud base is painted in to match the colours of the jhumka.

When this order came in, I knew I wanted to try the beautiful golden glass stones I had just procured. The glass stone didnt have a flat base but had some dimension, so I did try some ways to incorporate into the quilling dome base for the pendant and ended up with just the perfect way to incorporate them. The pendant is then finished with rows of blue, magenta and green ball chains. 

Finished with a golden rhinestone chain and strung with matching colour beads and gold dyed beads.
Ballchains and rhinestone chains from Teena Kg, dyed gold beads from A1 Craft, peacok studs and bail from AJ Beads and Findings, Glass stone from The Design Cart.


Thanks for stopping by :)


Lots of love
Pratyusha

Wednesday 10 January 2018

Engagement platter- 1st trail!!!

Heya Folks!!!

Its always exciting to work on something new that you haven't tried out before. Its also scary at the same time as someone has put immense trust in you to make something amazing for them.
When this order came in I was in 2 minds as I hadn't worked on something like this before.
 So here's the ring platter I had done long time back. The outline was precise- They wanted ring boxes with glitter and a lot of flowers but not much in 3 D. 
So I made a simple one with a wooden frame measuring 16.5 x6.5 inches. Using washi tape from Itsy bitsy I outlined the whole of the frame. 

The washi tape used here has a golden rose outline throughout and has a smooth texture. The base of the frame is covered with gesso and texture paste to improve the detailing in the base. I used golden coloured pearls in 10mm, 8mm, 6mm widths to make the outline in the frame. Used ring boxes with red velvet base and wrapped them with golden sequin lace. 
Used multiple jute and mulberry flowers to cover the whole of the frame. The chipboard accents are covered in golden paste. Printed the quote and stamped their names using printer and stamps from my stash respectively. The flowers are from Itsy bitsy again. To finish off I added accents of viva decor inka gold paste.
This was the first time I did something of this sorts and love it totally. Thankyou Nalini mam for the order mam.
Do leave me some feedback. Would love to hear what u think of this project.


thanks for stopping by :)

Lots of love
Pratyusha

Tuesday 2 January 2018

DIY: Basic Shimmer Crush Glitter Jhumkas

Heya folks!! 

It's been quite sometime since I shared a tutorial with all of you.

Today I would like to share a project regarding “How To Make Basic Shimmer Crush Glitter Jhumkas.” which are always in trend to add glam to your fashion and stand unique everytime….This is for all who love traditional accessories. so lets begin with few steps on making jhumkas…


Materials required:
#Quilling strips (3mm or 5mm depending on your choice)(5–7 strips to make a dome)
#Fevicol
#Quilling mold
#Quilling tools
#Tooth picks
#Itsy Bity’s Shimmer crush glitter (you could you any glitter powders you have)
#Itsy Bitsy’s decoupage gloss glue.
#Earring findings (as per your wish)
#Thermocol base
#Paint brush
Method:
Step.1: Roll togerther 7strips of 3mm quilling strips. Give it a dome shape using the quilling mold. Make sure the dome is smooth and doesn’t have ridges. Apply fevicol to the underside of the dome and let it dry.
Step.2: Once properly dried for 1 hour. Insert a toothpick to the underside of the dome so that you can hold it easily.
Step.3: Apply a coat of decoupage gloss glue and sprinkle a uniform layer of Summer crush glitter powder. Try to tap excess away as much as possible.
Step.4: Leave it to dry for 1 hour on the thermacoal base. Once dry use a paint brush and remove any loose particles of the glitter powder.
Step.5: Repeat steps 3 and 4 two more times for a good coverage.
Step.6: Once satisfied with the coverage, apply a uniform coat of decoupage gloss glue and let dry. Once dry apply a coat of varnish.
Step.7: Lastly add your earring findings to complete the jhumka.
Hope it was a simple method to follow.

Happy Crafting!!
Thanks for stopping by :)
Lots of love,
Pratyusha :)

Monday 1 January 2018

Happy new year 2018 :)

Heya folks,

Welcoming 2018 with the release of Pratvam Progs calendar. Here's wishing all of you a very happy and prosperous new year!! Have a great year ahead!!! 
#newyear #handmadewithlove #calendaerelease #releaseofcalendar#releasedbymommy #mommylove #craftingisawayoflife #promisetoimprove#promisetoreinvent #pratvamprogs

This year I wish to share more of my projects and tutorials :)
Would also like to thanks everyone for all their support and love :)

Here are a few pics of my calendar and my mum releasing it :)


Thanks for stopping by :)

Lots of love :)
Pratyusha